In this post i am going to tell you the setting of dslr camera or a mirror less camera you have taken recently.This will help you taking sharper and clear image quality.This will be the basic setting for you camera.Now days every month or so there is a new launch in dslr camera.I myself try to use every camera which comes in market for at least 10 days so that i can give you a better review but its not possible so i assume that people who have bought a dslr camera recently and don’t know how to setup you camera so today i am going to tell you some basic setting for beginner.These are the setting which i always put in every new camera i go through so that its ready to use and i could use it in my own way.
- APERTURE & SHUTTER PRIORITY MODE
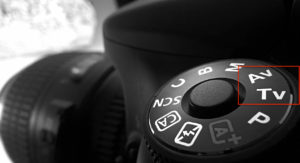
Starting with the most basic thing which i always start with a camera is “camera mode”I know its very confusing for the beginners to understand modes of camera. So just to give you an over view if you are a Beginner you can not use manual mode easily so what i recommend you is to shoot in Aperture or shutter mode. In canon you have it with AV &TV option, in Nikon has a different term so does Sony, Panasonic cameras but the basic feature is same .In aperture priority you just have to put aperture number camera auto sets ISO & shutter speed similar in shutter priority you just have to put shutter speed you want rest the camera with set up by itself (ISO & aperture). In this you have benefit that you don’t have to struggle so much for you camera setting camera does half work by it self. You keep shooting camera will do the setting by its own.So i suggest you to shoot in aperture priority mode & trust me this will help you as before you might be stuck in focus setting & all .You could now be able to focus on your shooting with resulting in better images.
- SHOOT IN RAW
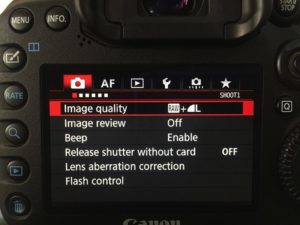
When every i click pictures i try to shoot them in raw format +jpg .The benefit behind this is that when ever if i have to edit the picture i could use the raw format of the picture because in raw format you have much more detail rather in jpg and when you are editing the picture you can play with details and many more things which is not possible with jpg format. I use jpg mode for random selection and just have the view of picture and raw format images to edit. If you are willing to do more in photography and do better editing you should start following this step.
- BACK BUTTON FOCUSING
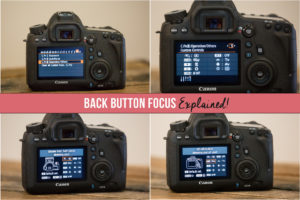
Normally when you press the shutter button first you have to set focus while pressing half and then when we focus it goes down full and picture is taken.So what i do is using back button focus technique i assign the button for focus. So now the shutter release button will just take picture you don’t have to focus again and again the back button will be the focus button now the benefit are like when u are shooting a portrait you and your subject distance is fixed you focused your subject once from you back button after that you can take multiple pictures without loosing focus unless the distance is fixed. This is one of the uses of back button focusing. I myself have been using this for 3 to 4 years and i still put up this setting in every camera i try.
- WHITE BALANCE

When you click a picture at times its more at yellow side or blue. If i tell you in brief temperature of the image range between yellow and blue tones. Now if you shoot jpg format of image you have to put down the white balance effect you want. So as i told you before the setting of raw format because when you are shooting in raw best thing is you set the white balance in auto and when you have taken the shot you can rearrange it while editing the final picture (light room or Photoshop). You can also preview all the white balance effect available in you camera in Adobe light room. This is the best feature if you take pictures in raw format of images. I allways keep my camera white balance in auto and when ever i have to makes any changes i do it while editing it in adobe light room.
- SHUTTER SPEED
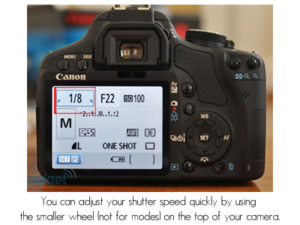
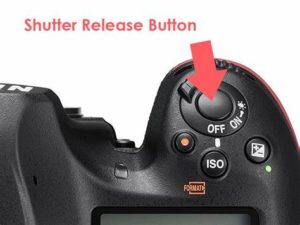
Coming on to the next point this is the biggest query i get to hear is when you click a picture it have a shake and blur effect that means your shutter speed is at lower side. In most of the situation what i do is you get a option in camera where you can fix the shutter speed it wont go beyond that. For example you are using 50mm lens so the shutter speed fixed should be somewhere 1/50 .If you go beyond that there are chances that you see shake in picture. So go to setting at set your shutter speed in a limit so that it does not goes beyond that and you have a sharp and clear image
- FOCUSING
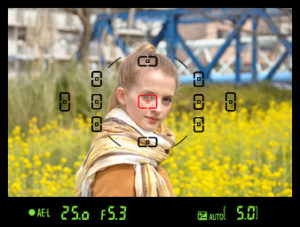
Usually when you buy a new camera and you try to focus you see boxes allover the subject and it focuses in any point and takes a picture what i do is i make a selection of single servo focus.In this option you can manual drag the box to to where you want it to be focused. For example if i am shooting a model i will drag the box towards model eyes or nose this will not let u have out of focus pictures and camera wont focus any unwanted areas. So this is one of the most important setting if you want properly focused pictures.
- METERING
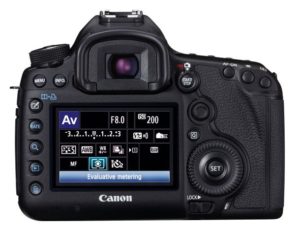
This setting is mostly ignored by many people i am talking about metering modes. at times when you are shooting and you feel you have the correct setting but you end up having over or under exposed picture.That can mean that the metering setting in you camera is not set properly. usually you have three metering modes available matrix/center weight/spot metering. Now in matrix what happens it takes an average exposure of the frame in center weight the exposure is also consumed from the center of the frame only 25 to 3o percentage of light it wont detect elsewhere for light.Spot metering is like when u taking a picture of a model you click the picture of her face and spot metering in on only the selecting are will have light rest elsewhere light is there the camera wont detect it. Spot metering will only take the exposure of the spot area and will give you the setting for it. So depending on the situation now you can take accurate exposure pictures when you are working of camera auto or semi auto modes.
